Often there is confusion around the coaching strategies within EA Sports NHL games. What are the best settings? Should we change them? What do they even do?
All questions I’ve asked myself in past years as well. We aren’t all hockey coaches so how are we supposed to know what each strategy does and/or when to use them. The in-game descriptions are quite vague or non-existent so you pretty much are forced to do some research or watch AI vs AI games while “coach” position locked and see what the players actually do. Who has that kind of time!?!? … Fortunately for all of you, and sadly enough for me, I do!
I started with research, but appears there is some room for a bit of interpretation on most hockey strategies so I decided that watching the in-game AI would be best way to determine exactly what positions these strategies will be putting them in.
In this guide, we will cover Offensive Zone Bias, Forecheck, Offensive Line Strategies, Neutral Zone, Defensive Line Strategies, and finally Defensive Pressure. Breakouts and special teams will have to wait for another day Check out Coaching Strategies Part Two for breakout and special teams strategies.
Here we go!
Disclaimer: I originally wrote this guide for NHL 17, but the strategies haven’t changed at all for NHL 19 so the below is still all applicable 🙂
*To keep it consistent, all of this guides screenshots/videos and the descriptions for them are from the perspective of playing with the Nashville Predators.
Offensive Zone Bias
How to adjust: Left or Right on the D Pad
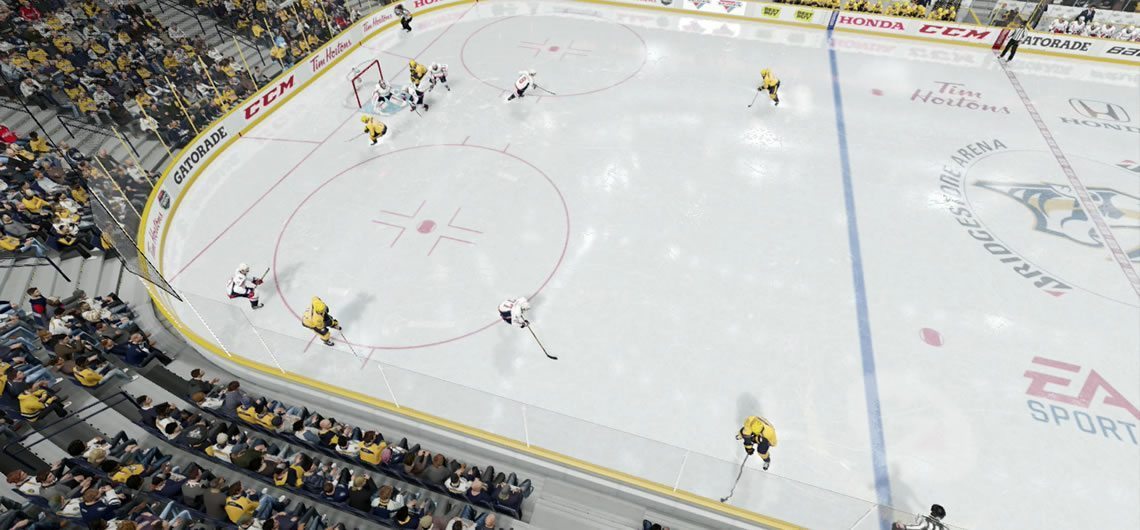
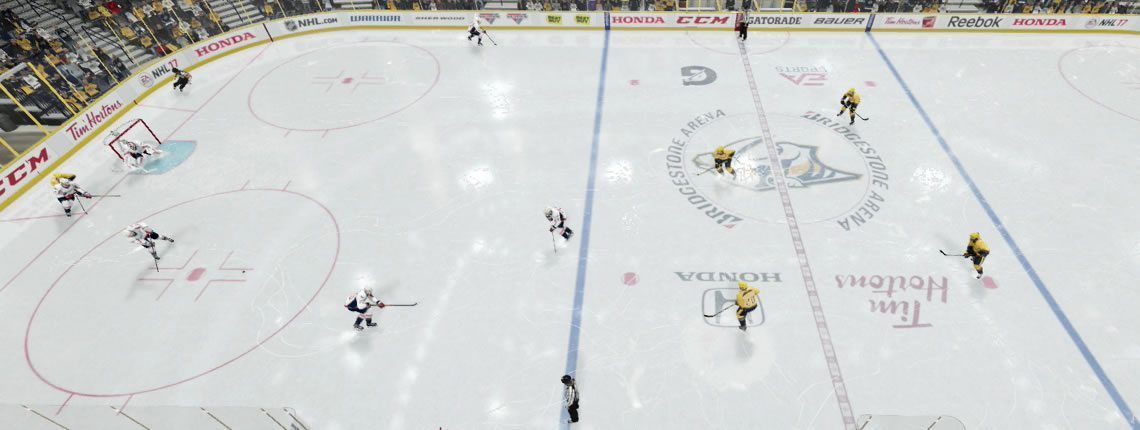
It might seem odd to cover the offensive zone bias before we even get into the different forecheck and neutral zone formations; however, this plays a huge part in whether your team is on the forecheck or is backing up into the neutral zone.
When a puck is loose in the offensive zone your AI has to decide whether it’s going to get into the zone to setup for the forecheck or if it’s going to back off and setup in the neutral zone to defend.
There are 5 different settings you can use for this:
- Neutral Zone Trap
- Sit Back
- Balanced
- Press
- Full Forecheck
Most of you, if not all, can likely guess how those settings will work. They range from bias completely towards the neutral zone with “Neutral Zone Trap” all the way up to Full Forecheck where the bias is completely in the forechecking zone.
As an example, when I was getting the screenshots/video for Neutral Zone formations I set it to “Neutral Zone Trap” so as soon as the puck was loose in the offensive zone they would go straight into one of the neutral zone strategies and I could capture it. That means that even if one of your players dumps the puck in, they won’t chase it – they will just go straight into the trap.
Forecheck and Neutral Zone strategies only come into play when you DON’T have the puck. When you gain possession of the puck then you will be using one of the offensive line strategies which we’ll cover later on in this guide.
Forecheck
How to adjust: Left or Right on the D pad to bring up the menu then RB or R1 to change forecheck strategy.
For those who are new to NHL 19 and hockey in general:
Forecheck is a defensive play made in the offensive zone with the objective of applying pressure to the opposing team to regain control of the puck.
–wiki
The most popular example of this would be after you dump the puck into the offensive zone you will go after it applying pressure to the opposing team’s defense in hopes of getting the puck back and getting setup for a scoring opportunity. Forecheck can also happen after a rebound or a turnover.
There are four different forecheck strategies in NHL 19: 1-2-2 passive, 2-3, weak side lock, and 1-2-2 aggressive.
I’ve included the in-game descriptions and then went into more detail for each strategy.
1-2-2 Passive
Description: forecheck with all skaters looking to prevent breakout passes.
2-3
Description: two nearest forwards pressure the puck, while the third forward drops back defensively.
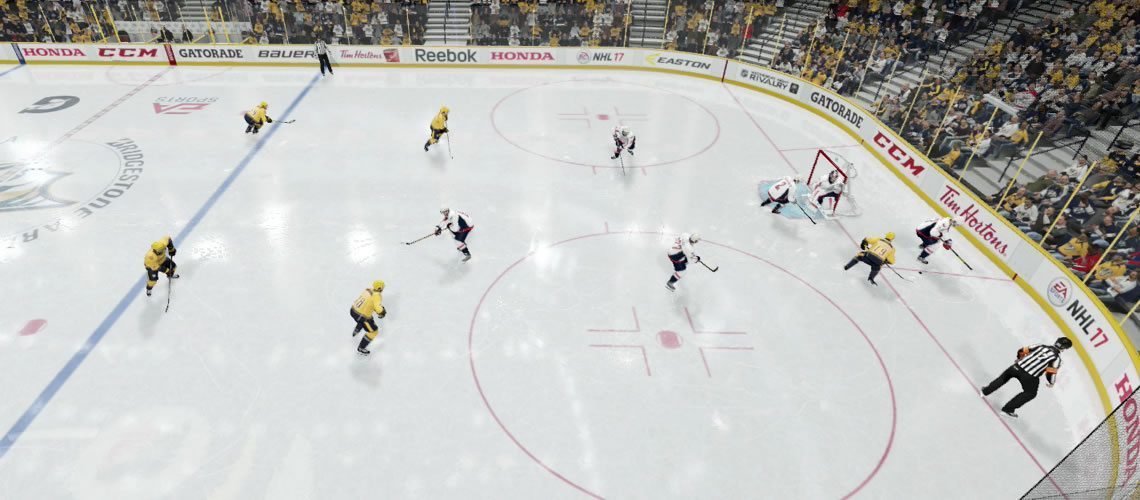
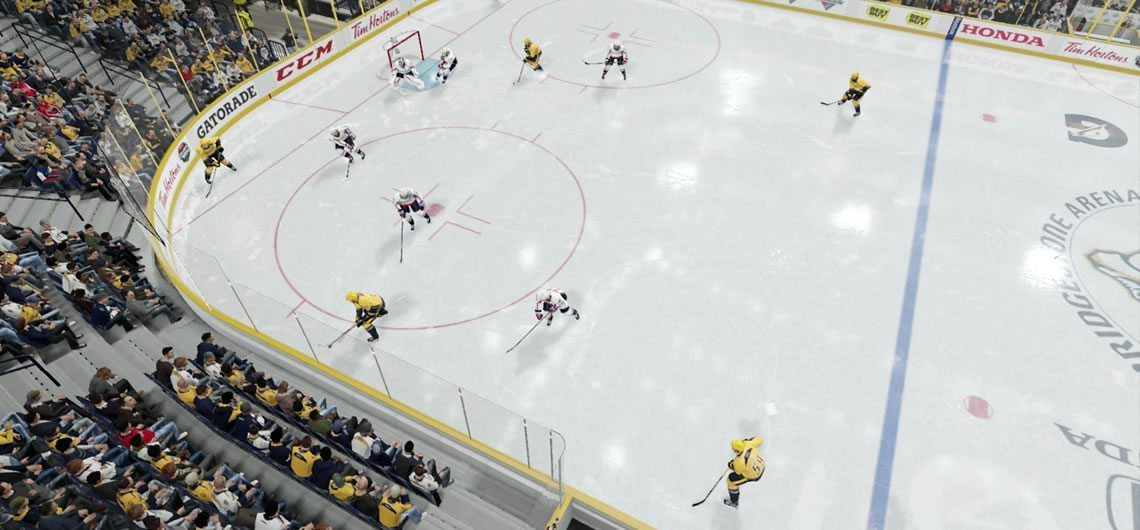
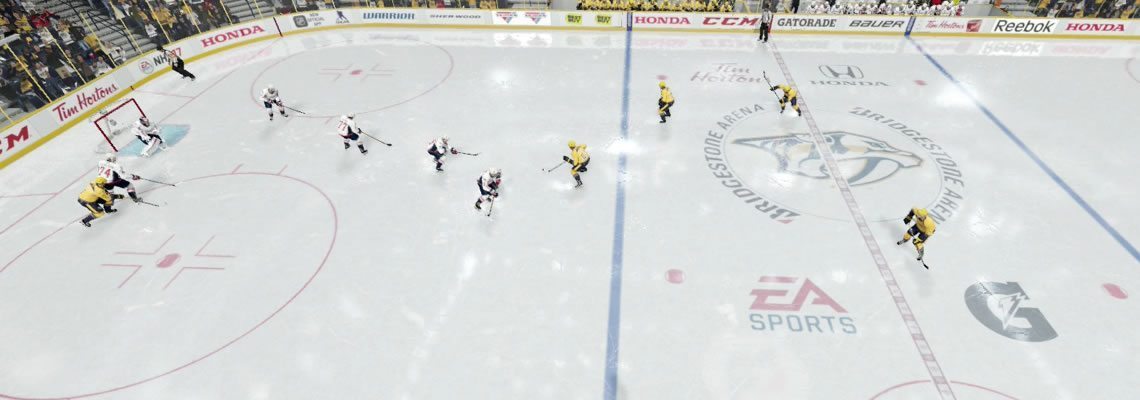
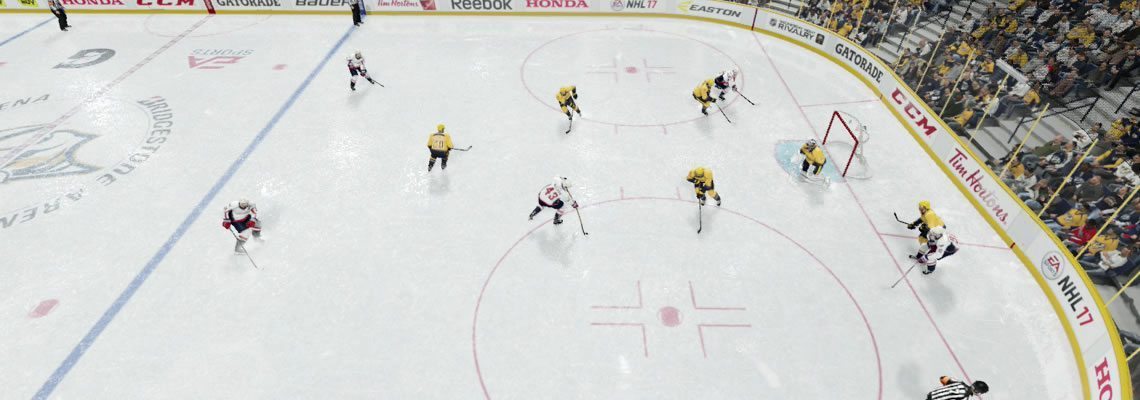
Weak Side Lock
Description: forwards will pressure the play along the boards, where the strong side(side the puck is on) defenseman will pinch along the boards, while the weak side defenseman will drop back and cover the point.

With that said, notice how the strong side D man gets right up near the boards, if the puck comes up that way he’ll pinch down or if the puck goes around the net to the other side the centerman will follow it and that far side winger will come down to pressure the play along the boards and then the now weak side winger closest to us would drop back into the up high position.
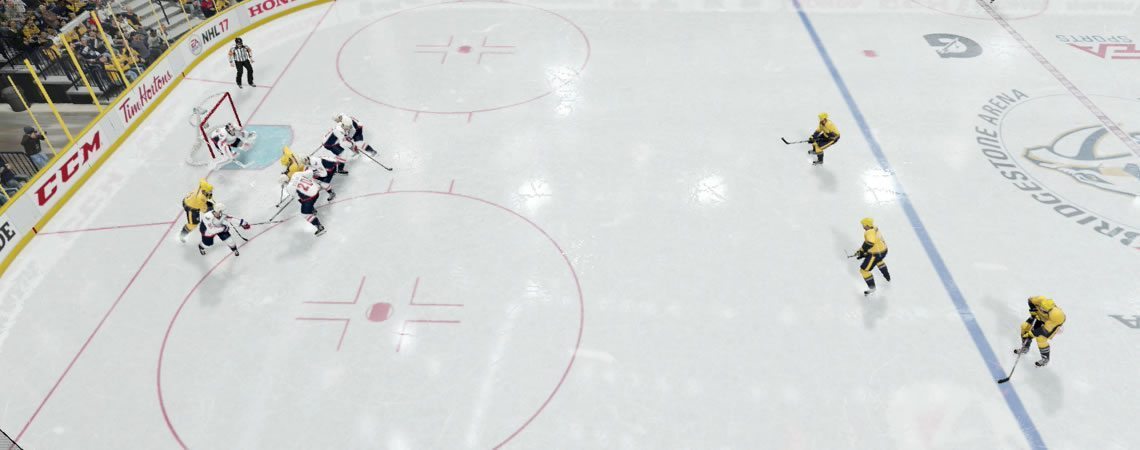
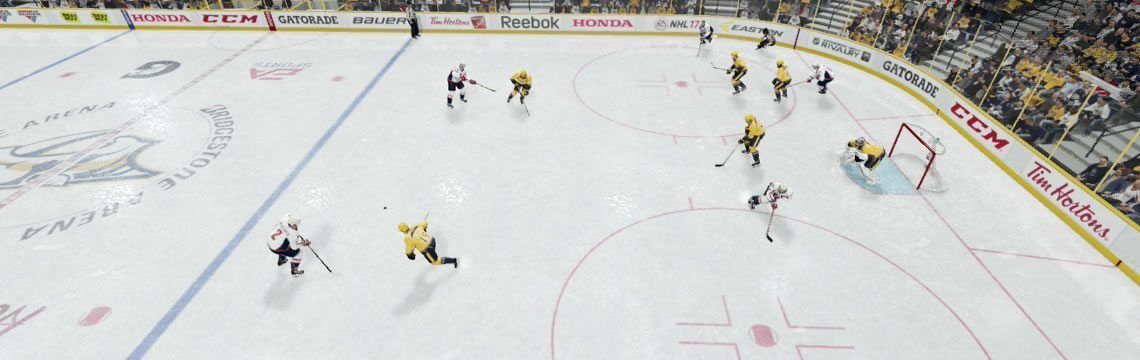
1-2-2 Aggressive
Description: one forward in deep, forcing play up the boards into team mates.
In comparison to the 1-2-2 passive you can see how the 2 mid players are positioned further down. If the one player in deep works the play behind the net then the right side winger can drop down and continue pressuring the puck, if the player in deep works it up the boards then the left side winger can work to close off the lane and gain possession.
Offensive Line Strategies
How to adjust: B or Circle to bring up the menu then RB or R1 to cycle through strategies.
*These are per line settings. Each line can have a different offensive zone strategy.
Offensive zone strategies are what your lines will use when they HAVE the puck as opposed to the forecheck and neutral zone strategies that are used to try and gain possession of the puck.
NHL 19 includes 3 different offensive strategies, which have been the same for many years in the EA Sports’ NHL series: Overload, Crash the Net, and Behind the Net.
*These aren’t set plays. They are positional strategies that you could create plays based off of since you will know the general position of each player.
Behind The Net
Description: Control the puck down low near the boards.

Crash The Net
Description: Best suited for strong, physical players. Allows for lots of shots using both screens and deflections. Players without the puck crowd the net on the rush.
EA Sport’s description does a good job of describing this one. Forwards that don’t have the puck will crowd the net as you can see in my screenshot above. Given how prevalent deflection and rebound goals are in NHL 19 it is certainly not a bad strategy and definitely the easiest to execute as it comes down to just getting shots on net from anywhere.
Overload
Description: Best suited for skilled players.
With that said, it is true that this strategy is best suited for skilled players. It usually involves a lot of cycling the puck as the goal is to pull defenders out of their position so you can open up a passing or shooting lane. If you frequently lose the puck then it’s unlikely you will be able to execute it as intended.
You can see the difference in the screenshot versus the “Behind the Net” positioning. There is closer support down low so you can do short passes and the winger is a bit higher on the boards.
There is a lot of opportunity for you to cut out into the slot here as you cycle. Just based on the screenshot you can tell that if any of those 3 players over commits then it will open up a possible lane or one-timer pass to the far side winger beside the net.
Update: Looking for more advanced Overload tips? Check out my new How to Score Using Overload post.
Neutral Zone
How to adjust: Left or right on the D pad to bring up the menu then LB or L1 to adjust neutral zone strategy.
Same idea as forecheck strategies except in the neutral zone instead of the offensive zone. There are again four different settings that we will cover in detail below: 1-3-1, 1-4, 1-2-2 Red, and 1-2-2 Blue.
1-3-1
Description: Neutral zone trap with one defender pressuring the puck carrier, three players defending the blue line, and one deep in the defensive end defending the net.
1-4
Description: Neutral zone trap with one defender pressuring the puck carrier and four players defending the blue line.
1-2-2 Red
Description: Defenders will hold the neutral zone and apply pressure to the breakout at the red line.
With that said, you will rarely see dump-ins when playing online players in NHL 19 as most want to just carry the puck in – so if this trap is done correctly you can get a neutral zone turnover. Especially in NHL 19 where the puck is really loose so checking players has become a little easier with the exception that stick lift currently doesn’t work but hopefully that will be fixed soon! May already be fixed by the time you read this(Please EA! Pleeeeease).
1-2-2 Blue
Description: Defenders will hold the neutral zone and apply pressure to the breakout at the opposing blue line.
Defensive Line Strategy
How to adjust: X or Square to bring up the defensive line menu then RB or R1 to cycle through strategies.
Now, if your opponents do manage to get past your neutral zone trap and setup offensively in your zone then your defensive line strategies will need to kick into action. These take three different forms: Collapsing, Staggered, and Tight Point.
*Strategies are set on a per line basis
It’s also a common misconception that these strategies only apply to your two defenseman, not true and in-fact they change your forwards positioning more than anything as you will see shortly. Think of it more as all your players being defenders when in the defensive zone.
Collapsing
Description: players collapse to the front of the net and slot.
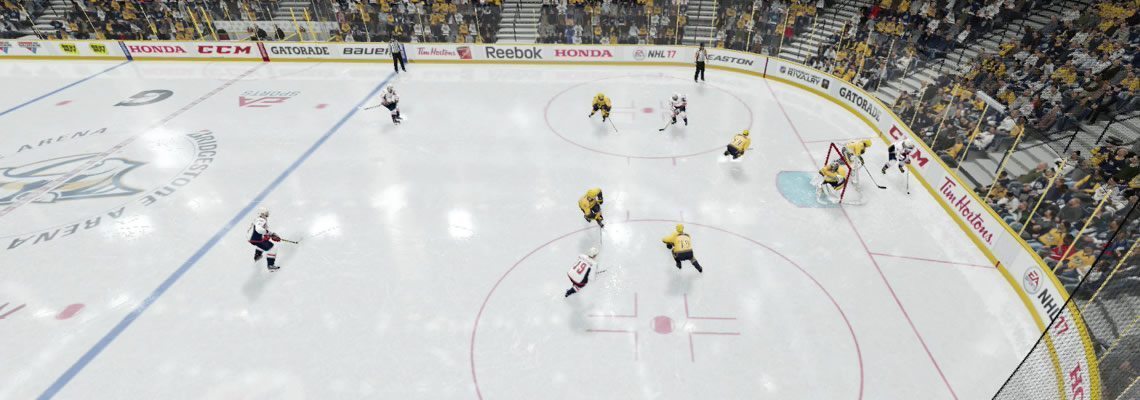
You can see how close the support is low in front of the net. This use to be my favorite strategy back in the days when the puck was basically glued to players sticks and they could just dance around until they got into the slot for that easy cheese snipe – having your defenders collapsed in the slot helped block that play.
Nowadays, and especially in NHL 19, with it being easier to knock the puck off players sticks; the dangling around slot cheese is not quite as common although still very prevalent if you get caught chasing and pull your players out of position.
One thing to note about collapsing in NHL 19 is that sometimes the AI gets a little too close. The below appears to be some sort of phone booth setup, I’m not exactly sure but now that I’m basically a pro hockey coach after watching all this AI vs AI gameplay, I can say for certain that it is not a good setup.
Staggered
Description: A good mix of low and high coverage.
Having that one player high makes this a staggered setup. You have at least some point coverage here. Which is very important in NHL 19 as there are a lot of goals coming from point shots.
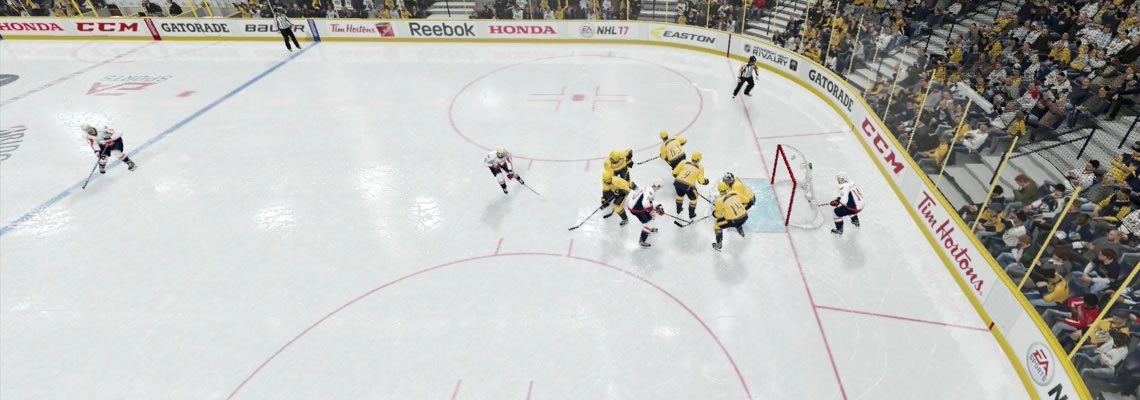
Tight Point
Description: Wingers staying up high to cover the opposing team’s defenseman.
As I just mentioned, there are a lot goals being scored this year starting with a point shot. So using a tight point setup isn’t a bad idea as it does help reduce that but notice in the screenshot, if that defenseman happens to get around your winger then they will have almost a perfect lane to take a shot. I still prefer the staggered setup for that reason unless they are taking an absurd amount of point shots and constantly passing up to them then the additional coverage up high and opening up the slot a bit may be justified.
Defensive Pressure
How to adjust: X or Square to bring up the menu then LB or L1 to cycle through pressure settings.
There are 5 different pressure settings ranging from protecting the net up to high pressure. I’ll list each and the blurb that they have in-game. The positioning from the above strategy will stay the same no matter what, but how aggressive the players in the vicinity are towards the puck carrier is what should change.
- Protect the Net – Players collapse in the defensive zone
- Contain Puck – players will stay between the puck and the net
- Normal – a solid mix of one on one and zone defense
- Puck Side Attack – Players on the strong side attack the puck
- High Pressure – your team is at their most aggressive
I normally go puck side attack as I want to put some pressure on the puck carrier to force a turnover. I’m not totally convinced there is much of a difference between the three middle settings, it was difficult to tell while watching AI vs AI. If your opponent is frequently skating into your zone and scoring from the slot then try the puck side attack or high pressure – your defenders do appear to step up more often when set to either of those two.
Recommendations
Before I make any recommendations, I just want to make a couple points clear.
1. In order to get the above screenshots/videos I had to go to both extremes, full forecheck and full neutral zone trap then set each lines bias towards dumping the puck in. In a regular online game you likely won’t often see the players setup exactly how I have them in the screenshots because they simply don’t have time to get into position between when you lose the puck and the opponent is heading up ice with it or when you regain possession.
The players will be reacting to the puck carrier and other players around them which will constantly be changing their positions.
2. When you are playing, YOU are part of the strategy. It was easy for me to watch AI vs AI and see where the players go but when you are actually playing it can be a lot more difficult to recognize where you should be. Familiarize yourself with the strategies you want to use otherwise you will end up leaving a big hole in your forecheck, neutral zone, and defense. The above information will hopefully help you avoid that.
I know I’ve poked a bit of fun at the occasional frequent stupidity of the AI(wtf Ekholm?!) but they can also be very smart – They react to your positioning, so if you skate in deep with the defenseman, the AI winger will drop back and cover the point. Or when you are cycling in the offensive zone if you pull the player below the red line up high then another player will drop down.
This leads us to the most common mistake players make online, trying to dangle around with one player and then losing the puck. While you were dangling and being forced all around the ice avoiding defenders you are creating chaos for your AI players as they attempt to cover your position thinking you are going into theirs. I mentioned this in my NHL 17 Defense Guide as well.
In short, sometimes the AI’s stupidity actually starts with your own! I know that’s a real buzz kill for all the “hate EA Sports” circle jerkers out there, but I did say sometimes 😉
Okay, onto the strategy recommendations.
These recommendations are based on how I like to START a game. Throughout the game you will hopefully pick up on your opponents play style and can adjust. I didn’t adjust them mid-game very often in the past; however, with what I’ve learnt from writing this post I will be using them a lot more and I encourage you all to do the same. Find out what fits your play style and more importantly what is effective against your opponents play style.
Offensive Zone Bias
A common theme throughout my starting strategies will be aggressiveness. I prefer to come out fast and try to get the first goal as quickly as possible.
I’ll start with a “Press” or “Full Forecheck” bias.
Forecheck
I normally prefer to carry the puck in unless I am forced to dump it. So Forecheck strategy doesn’t come into play that often for me. I’ll usually leave it on 2-3 or Weak Side Lock unless I’m pushing for a late tying goal then I’ll go up to 1-2-2 Aggressive.
Offensive Line Strategies
Overload or Crash the Net.
Overload provides more scoring opportunities for me than behind the net so I prefer it for my skilled lines and then your more grindey lines can take advantage of crashing the net for the grease goals.
“yeah, that’s right I use Overload… I must be pretty skilled. No big deeeal.”
Being completely honest, I forget to change these all the time; however, after writing this post I’ll be paying a lot more attention to it so I know the AI’s positioning. Unfortunately AI plays a huge part in online versus and most online game modes with the exception of 6v6 EASHL/OTP. Let’s be serious here though, how difficult is it to get 6 working adults all online at the same time for at least a few hours?
“Sorry guys my roommate needs the TV” … your household only has one TV? You are a grown ass adult go buy a cheap monitor! … Get it together buddy. That sort of lack of commitment is a great way to find yourself in free agency amirite?
Neutral Zone
Again, I start aggressive with a 1-2-2 Blue. If I find the opponents is often getting past my players for odd man rushes then I’ll scale it back a bit and also scale my forecheck bias back as well.
Defensive Line Strategy
Staggered.
With the effectiveness of point shots and rebound goals it just feels like collapsing isn’t as effective as it use to be. Having that high slot coverage helps a lot. You can always adjust if you find your opponents is taking tons of point shots or weaving their way into the slot.
Defensive Pressure
Puck side attack.
Beginning of a game I want to keep pressuring the puck carrier in all zones to make the opponent feel like they don’t have time to do anything, frustrate them. If they are getting around my defenders and into the slot then I’ll scale back to a “Normal” or “Contain Puck” strategy.
A very important note here again is not taking your defenders out of position, you will just open up holes for your opponent to skate right into and snipe. Definitely recommend checking out my Defense Guide if that happens to you frequently.
—
Wow, this ended up being much longer than I expected. Hope it’s been helpful! If you would like to be notified of new posts/guides then please do subscribe in the form below and/or Follow ChelTips on Twitter. You can unsubscribe at anytime, although so far no one has! Thank you 🙂
Any questions or comments? Share ‘em below.
See ya on the bench! er… I mean the ice.
—
Update: Ready for part two? It’s now ready for you! Check out the Breakout and Special Team Strategies.
Great article! I’ve always had a problem visualizing what each of these settings does so seeing them in action was very helpful.
Please keep the awesome content coming!
Thanks! I plan on it. Glad to hear this one helped ya out 🙂
Thanks bro this has helped a lot I keep this page bookmarked maybe now I can use overload so I too can be a skilled player
Np, that’s the dream I’m chasing… for us all to be skilled players.
My NHL Guru, first of all thank you for all the time and effort you put in gathering all this info that desperately needs too be known to affectively play the game and be succussfull! It saved me A LOT of frustrating hours and I’m pretty knowledgable about hockey in general. Plus, EA doesn’t really tell you this stuff. Again my appreciation.
C Lewis
Thanks! Good stuff. These are the things that I have been wondering for years. What about offensive pressure setting? How does it work? Is it just slider to adjust how quickly defenders joins in attack?
No problem! Sorry for the delay, was finishing up the next post which actually answers your question, part two of the coaching strategies: https://cheltips.com/coaching-strategies-breakouts-power-play-penalty-kill/
Your guess above is pretty accurate though 🙂
I’ve struggled with this series for a few years, even have been a division 1 player. This year was not going well until I found this page. I adjusted my strategies and have begun lighting it up.
I just had some guy losing his mind because I was running the table on him. My TOP was almost 10 minutes. Thanks a million for saving this series for me and making this fun again.
haha! That’s the best, glad I could help – no problem. Thanks for the comment.
This was beautiful!! I learned soooo much!! And I thank you!!
My pleasure! Thanks for the comment, Cheers 🙂
in NHL 17 in the live play when I try to use the d-pad for the offense and defensive strategy it won’t let me use is there a setting that I need to put it on
Hey Alez, yeah you can’t change those two settings during the live play. The reason is because back in NHL 16 or maybe 15, I forget, pulling those strategy options up disabled your poke check since that was the same button to cycle through strategies with. Obviously poke check is much more important during live play so they disabled those strategy options until between whistles instead.
Is there a way to save the settings you like or do you have to adjust before every online game?
If it’s Online Versus or EASHL you’re referring to then yes, unfortunately, you have to adjust before or during every game.
HUT on the other hand does allow you to pre-set most of the strategies via:
Team > Manage Lineups > Strategies.
A couple of the settings there don’t seem to be saving properly so make sure you still check double check it before the game starts.
Couldn’t have been explained better. Thx
How often do you use the saucer pass? Tried it in different situations, but unable to consistency use it effectively.
This is great!! Thx a lot! I learned so much.. in the netherlands (europe) hockey is not a nr1 sports… so i was totally in the dark …and totally frustraded with NHL 17 (although I like the game a lot…)
I have been playing NHL for the last two years. I’ve constantly searched for an article like this, but could never find it. UNTIL TODAY! Thank you so much for this priceless contribution to us newbs! I want to hug you bro #NoHomo!
haha! Glad it’s helping out.
So first of all, this guide is awesome. But I’m having problems with the strategies being selected automatically, and was wondering how to change it to manual?
Hey Bryan, what game mode are you referring too?
You should be able to change them manually using the D-Pad during the game or by pressing start and adjusting them in your “Manage Teams” menu. Unless you are referring to something else in which case could you explain a bit further? 🙂
I’m referring to the GM mode. Never had this problem since nhl 13. I’ve always been using the d-pad to change them, but after that whole draft glitch update, whenever I try changing the strategy, the game automatically changes it to what I assume it thinks is best
Hmm, I haven’t seen that issue in any other game modes. I don’t play much GM connected though. I’d suggest creating a case ticket with EA’s support here: https://help.ea.com/ca/contact-us/?product=nhl-17 they would have more info based on if they’ve received other reports of it 🙂
Alright thanks a lot! 🙂
Alright I don’t want to sound messed up but is there some kind of trick to this? I a perennial EA-NHL player, but whenever I change strategies on the fly or at a whistle, theu settings all change back to default. The screen literally comes back up and the strategies jump from what I set them on back to whatever the game feels I should use. I have no assistant coach options on anywhere, what could the issue be?
Would love to use this strategy guide to my advantage but it doesn’t seem to matter. I basically would have to setup initial game strategy then have to live with it the entire game.
Thanks
Joe
Xbox one
Deertd
Thanks for posting this, I know someone already said that but I don’t honestly care hahaha
Was 2014 the last year where they let us see an overhead layout of what each strategy “kinda” looked like in the menu screen? I skipped from 2014 to 2017 and MISS THAT. This article helps make sense of what the strategies are. THANKS!
I conceive this internet site holds some really superb information for everyone : D.
You conceive correctly.
What defence should I have going on when I am down 1-0 in the 3rd period and the opposing player is just skating around my guys and wasting time on the clock. Suuupperrrr annoyed that they are not playing the game. They just skate and dance around behind there net