The first thing I do whenever I get a new NHL game is change the visual and controller settings. NHL 19 was no different. EA, understandably, sets the default settings for a brand new player. Settings for a brand new player aren’t necessarily the best for someone experienced.
If a visual or controller setting isn’t included below then assume I left it as default.
Are you experienced enough to adjust these settings? Let’s go over them and then you can judge for yourself.
Quick Settings
Quick settings let you select your experience level, then it gives you the EA Sports recommended setup based on that. You can see in the screenshot below.
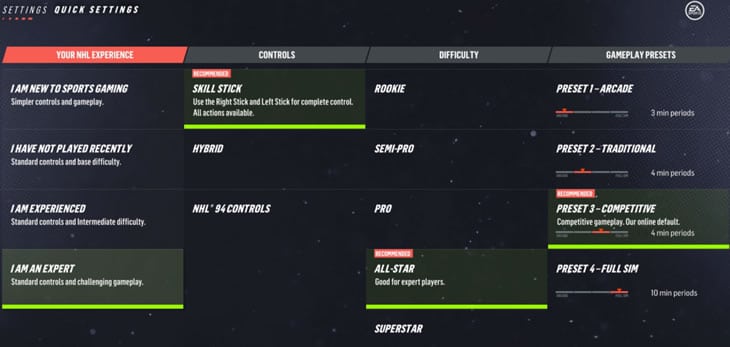
I mostly play online, the difficulty level set in your quick setup doesn’t make any difference there, online gameplay is always set to “All Star” for any ranked modes.
The one option that I would strongly recommend using, even if EA recommends otherwise based on your NHL experience setting, is “Skill Stick” for controls. If you are still using buttons for shooting or any other actions that are done with the skill stick by default, then you will be at a disadvantage. The quicker you learn how to use the skill stick the better!
Visual Settings
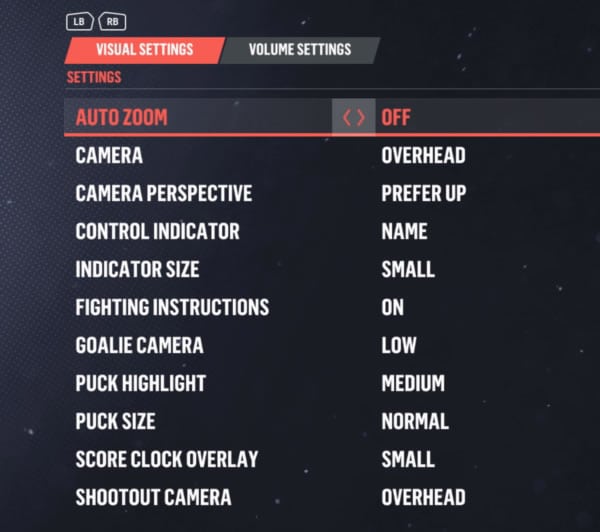
Above is a screenshot of all visual settings. I’m only going to comment on the ones that I change.
All the descriptions below are taken from in-game.
Auto Zoom
Description: The camera will automatically adjust itself to show the best possible camera angles.
While the above description sounds good, it depends on the camera that you use. We’ll get into the camera angles in the next section, but if the camera angle you use shows the full width of the ice, like Overhead, then the constant small auto-adjustments may be more annoying than helpful.
Since I use Overhead camera view, I keep auto-zoom turned off.
Camera
Description: The angle of the in-game camera. Adjust height and angle by changing this setting.
The in-game camera angle is an important setting. By default, EA sets it up so you focus more on your player, which means you can’t see every player on the ice. Fewer players on the screen at any given time may be beneficial for a beginner as it would mean less distractions, but of course, knowing where all your teammates are at all times is a big advantage when it comes to setting up plays.
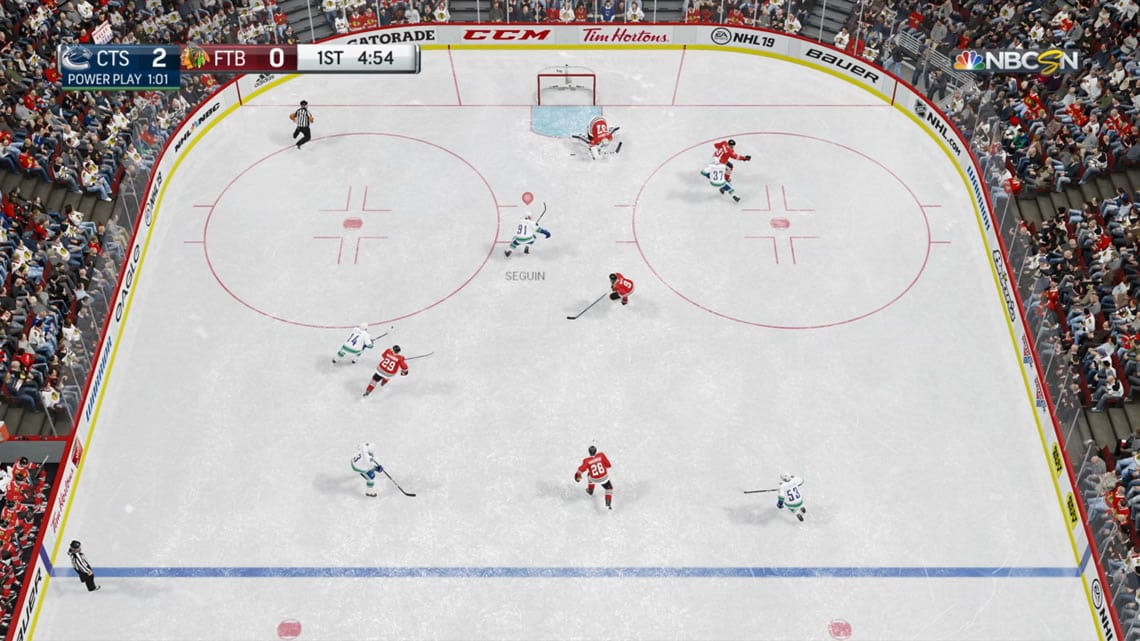
Recommendation: I’ve been using Overhead for years and don’t see that changing anytime soon. I alluded to the advantage of it earlier; check the screenshot below, you can see the full width of the ice. In most cases that means being able to see all the players on the ice.
If you aren’t familiar with all the different angles, then check out my Best NHL Camera Angles post. It has screenshots to show you examples of how each camera angle looks.
Indicator Size
Description: This setting controls the size of the indicator above a player’s head. When set to “off” no indicator will be shown.
Recommendation: Small
It is set to Large by default; you can see a comparison below.

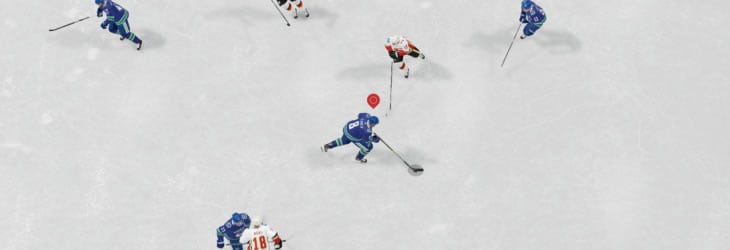
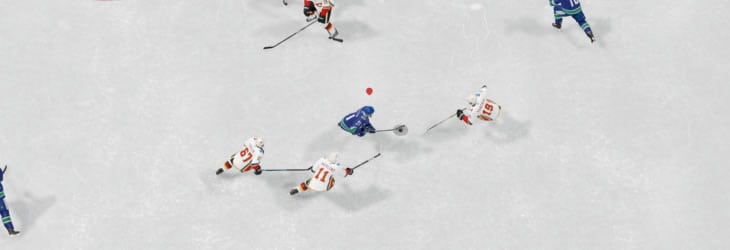
I find the Small indicator to be a nice happy medium.
Score Clock Overlay
Description: The score clock will be on screen and will automatically appear/disappear, or you can completely remove it from appearing on the screen during gameplay.
Recommendation: Small
By default the score clock is set to “Authentic,” you can see the difference below:
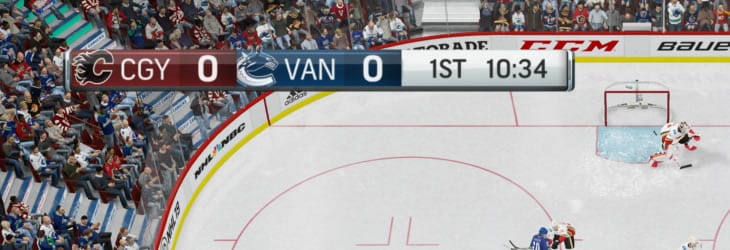
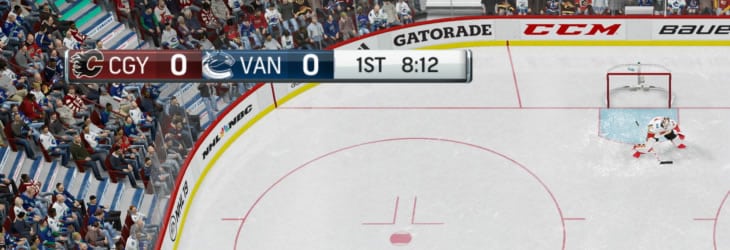
I prefer the small scoreboard for the simple reason that is blocks less of the screen.
Shootout Camera
Description: The angle of the camera during a shootout. Adjust the height and angle by changing this setting.
Shootout camera is likely more just preference than anything. Since I’m in Overhead view all game, I’m the most comfortable with that view, so I prefer to keep it for shootouts as well.
Controller Settings
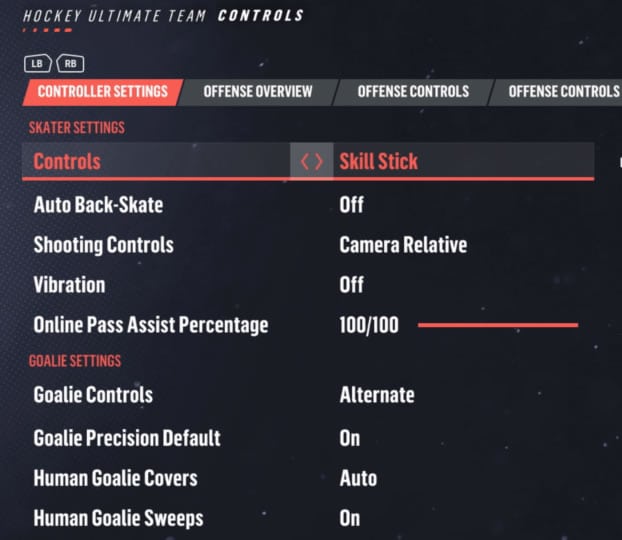
Above are the controller settings that I currently use.
Auto Back-Skate
Auto Back-Skate decides for you when you should be skating backward. For example, if your opponent is breaking out and you’re ahead of them then the game should spin you around, so you’re skating backward and can defend properly.
Auto Back-Skate is a nice feature to ease beginners into getting used to skating backward; however, once you get familiar with Vision Control(LT or L2) then you will want to turn this option off as you can control for yourself when you want to skate backward.
I highly recommend that all experienced players turn Auto Back-Skate OFF. While Auto Back-Skate works well enough for it to be useful for beginners, you will find that it sometimes turns you around when you don’t want to skate backward. The solution is to turn it off and control your backward skating with Vision Control.
Vibration
Vibration is another one that is just preference. I find the constant controller vibration on every hit annoying, so I turn it off.
Online Pass Assist Percentage
There has been a lot of debate since NHL 17, when Online Pass Assist was introduced. Many found, including myself, that having it lower resulted in better pass accuracy.
I don’t believe that is the case in NHL 19. I’ve kept mine at 100/100, and so far I’ve had my best online passing % that I can remember in NHL, it’s been sitting around a 80-81% avg.
Goalie Controls
You can choose between using the default or alternate control scheme while playing as a goalie.
“Default” is a newer option that was introduced back in NHL 17(I think), before that “Alternate” was the default. I don’t play goalie much, usually only if I swap to goalie in my Versus matches, so I never took the time to use the new goalie controls – I’m thankful EA kept the old style in the game. I know some goalies still prefer Alternate as well.
If you’re a goalie, I recommend following TheCreasePolice and BetweenThePipes; they’ll provide way better goalie tips than I ever will. Give their shared BetweenThePipes YouTube Channel a sub.
